
Since Ethan and I have taken all of the pictures on the blog, let’s take a look at how we took them! Keep in mind that we are nowhere near experts on the subject, but we both bought DSLR’s at the same time (thank you Black Friday!) and enjoy learning about photography. We are not at the point yet of working in Manual, so we use Apeture priority right now. I bought my DSLR thinking I would use it primarily for taking pictures of my cakes, but taking pictures at Disney World was something Ethan and I both really enjoyed, so it’s up there on the list as well. Also since starting this blog I’ve taken it out quite a few times, so it’s slowly starting to come out of the bag more often!
Camera Bodies
I have a Canon Rebel SL1 and I love it. It’s a very small DSLR, but I’m small so it seemed fitting. It came with the kit lens (18-55mm). The only downside of the small size is it looks absolutely ridiculous with the 17-200mm lens we bought, because it’s so large. I think for that lens we will stick with using Ethan’s camera.
Ethan has a Canon Rebel T5i, and is a really good entry level DSLR. His is larger than mine and the screen can flip (I actually use it for filming videos so I can see myself and objects I hold up making sure they are in frame and in focus). There wasn’t too much of a difference between the models, and when I was looking I debated getting his, but I’m glad we got different ones so we can tell them apart and see the differences. His camera also came with the kit lens.
Lenses
I have a 40mm f/2.8 lens, which I used a lot at Disney. I love it because it as a great depth of field and achieves a nice bokeh. The only downside is because it is a prime lens you have to “zoom with your feet” or move closer to the subject yourself, which isn’t always possible. I used this lens the majority of the time when we were in Disney and know it can take great pictures.
Ethan bought a 10-18mm f/ that he used a lot. It was nice because if people were in the way he could get really close to whatever he was shooting and it still looked like he was far away. You just have to be careful when you get too close, because it can warp your subject like a fisheye lens. It can be found here.
We recently bought a 70-200mm f/4 IS L series lense that I can’t wait to use on our next trip. I can picture using it on Kiliminjaros Safaris to get some great close-ups. You can find it here.
Accessories
Ethan bought a Neutral Density Filter before our trip and used it while taking pictures of the fireworks. He bought a Tiffen 67mm ND 0.9 filter.
We have a tripod, a Manfroto befree. It’s fairly light and really easy to use. We didn’t carry it a lot on our last trip to WDW, and the day that we did we had it stored in a locker for most of the day. It folds up very small which is great for travelling. You may have seen it in my last YouTube video!
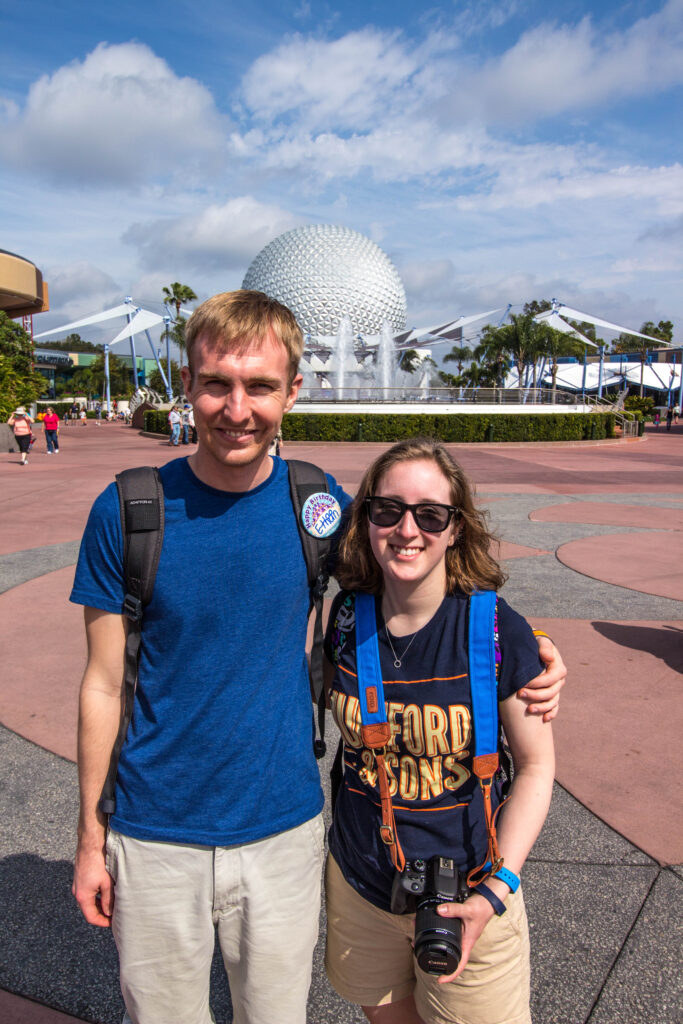
My camera strap is by Fotostrap, and I absolutely love it. I got it in 2014 as a Christmas gift, and I was so happy to have it in Disney World! I have the Cobalt one, and it is just the right amount of colour. It has grip on the back of the leather piece so it doesn’t move around, and it’s very comfortable. Seriously, I cannot say enough good things about this camera strap! You can see it pretty well in the picture below.
Ethans camera strap is Disney, so of course I got it for him! He got his for Christmas this year. I found it on Ebay.
As you might be able to tell Ethan is in charge of buying equipment, and he also bought a remote before out trip last year. He bought a FotoTech wired remote. We used it during the fireworks, and it was great!

Storage
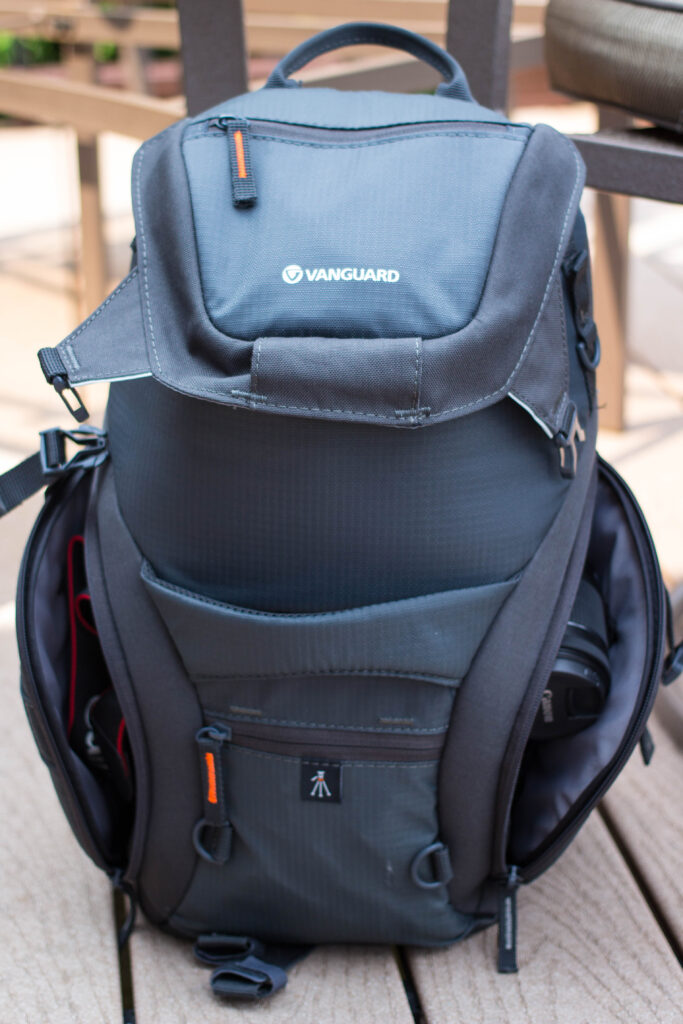
I’ve talked a little about Ethan’s camera bag and how we used it on our last trip in this post. It’s a Vanguard Adaptor 45 and can be found here.
My camera bag is a lot smaller, so I usually don’t take it to Disney. I got the one I did thinking about cake deliveries and not wanting to carry a huge camera bag. It’s by Cameron, and can be found here.
Post Processing
Adobe Lightroom 6- I used Adobe Lightroom to edit all of my pictures. It’s very easy to use and really brings the pictures to life. I’m so happy we purchased this software last year.
Books
I should also mention the one photography book we have, Understanding Exposure. I got the newest version for Ethan for his birthday, so he’s in the process of reading it. I’m next!

If you are interested in photography I’d love to hear what equipment you have, please let me know in the comments!
* please be advised some of the links provided are affiliate links, and I receive a (very) small commission if these links are used when purchasing . This does not cost you anything extra, and I greatly appreciate your support in my blog by doing so!*
As always, thank you so much for reading!
